|
Making Steel Pans from Oil DrumsChoosing an Oil Drum The first step in making steel pans is to decide the type of steel pan you will make. Then use the following table to determine the number of empty 55(US) gallon oil drums that you will need.
Choosing oil drums of suitable thickness is very important when making steel pans. Lower pitched steel pans(steel drums) like those from the guitar pan to the bass steel pan will require thicker oil drums. However, oil drums that are 1.2mm thick will work for most steel pans. The steel of the oil drums should be mild but not galvanized, which may produce steel pans of inferior tonal quality. Do not attempt making steel pans from oil drums that contain sharp dents or deep rust. Sharp dents will make it difficult to produce a steel pan with a smooth playing surface, while deep rusting may result in the oil drums bursting during sinking. 
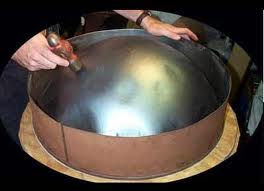
Sinking the oil drum Tools required - gloves, a marker, a compass, a 2.5 to 3kg hammer 2.5 to 3kg and earmuffs. The process of making steel pans from oil drums involve sinking the bottom of the oil drum (the end without the opening) into a smooth concave shape, where the notes will be later placed. By sinking the oil drum you will also eliminate the natural vibration of the playing surface, which would otherwise interfere with the clarity of your notes of your steel pan(steel drum). Before sinking, you may have to hammer out any dents that may be on the rim of the oil drums, as they will adversely affect the outside notes. Now, we must find the centre of the oil drum. To do this, measure 26.6 cm from several points on the rim of the oil drum towards the centre.Use your compass and marker to draw 2 concentric circles of radii 10cm and 20cm from the centre. You have now divided the oil drum radius into three parts, which will make it easier to monitor the shape of the oil drum while you are sinking. Using the sledge hammer, strike the oil drum along the outer circle, working towards the centre using a spiral approach. When you reach the centre, work again from the outer circle, repeating the process, moving slowly around the oil drum until you get the required depth as shown below.

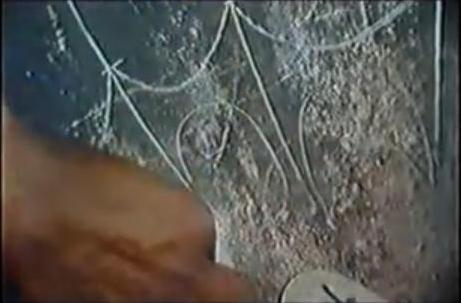
Marking the notes You will need a flexible ruler and a pen for this task. Click below for the location on your oil drum where you will be marking the notes. Going along the rim of the oil drum, mark the length of the outer notes, then draw lines from these marks towards the center mark of the oil drum. Note that some tuners do this before sinking the oil drum. Mark the inner border of the outside notes with your flexible ruler. Draw elliptically shaped inner notes so that they point longitudinally towards the center, a minimum of 1cm close to and along the same axis as their corresponding outer notes. In order to maintain independence between them, do not draw adjacent inner notes closer than 1.5cm from each other . Location of steel pan notesThe picture below shows the notes being marked after an oil drum has been sunk. This step is very important when making steel pans, as bad placement of notes on the oil drum cannot be reversed after a steel pan has been made! 
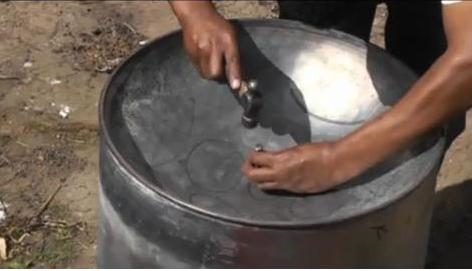
Backing and Grooving Tools required - Metal Punch, backing sledge hammer and a smoothing hammer with a plastic head. Use the backing hammer to lower the surface between the marked notes. This will leaves the notes with a convex shape, which will be delineated by grooving. Using the punch, hit along the marked inner borders of the outer notes first to form a continuous line and joining the grooves of adjacent outside notes. The grooves for the inner notes will be done next and will not be joined. For the inner notes, groove the straight part first. In the picture below, an oil drum is being grooved. 
Levelling Use the backing hammer to flatten the "swollen" areas between the grooved notes until the oil drum resumes its smooth concave shape. The notes should now be seen as convex dents on the concave oil drum surface. Cutting the Oil DrumUsing an electric jigsaw will simplify this step in making a steel pan. If one is not available you can use an old cutlass and a hammer. The oil drum should be cut by first drawing a line around its circumference at the desired distance from the rim then making a hole on the line. Now use the electric jigsaw to cut the oil drum along the line. The lengths for the various types of steel pans (steel drums) are listed below. The cut length for each steel pan is called its skirt.
Tempering Place the steel pan over a log fire for about 10 minutes, supporting it with 4 large bricks. Then let it cool naturally or dowse it with cold water. 
Tuning Tools required are: A large tuning hammer, a plastic tuning hammer, a pan mallet, a good musical ear and an electronic tuning device. The steel pan must first be coarse tuned to soften the notes and give them the correct pitches, then it is fine tuned to get the characteristic timbre. For each note of the steel pan, hit the entire note several times from above and below to soften it. A bent iron or a tapered piece of wood can be used to raise the outer notes from below at points near the steel pan rim as it will be impossible to reach there with a hammer. Tap each note of the steel pan to adjust its pitch then hit it with the rubber tipped end of the pan mallet to hear the pitch and compare it with that from the tuning device. This is where your ears come in.
To lower the pitch of the steel pan notes, hit the middle of the notes from above or along their perimeter from below. To raise the pitch, hit from above around their perimeter or in the middle from below.You will have to do this until you find the correct pitch for each note. A pan tuner coarse tunes his steel pan below 
Hanging the steel pan (steel drum) Hold the steel pan at the rim with your thumb and index finger so that it tilts towards you at about 15 degrees to the horizontal with the bottom notes close to your body. Mark the points where you were holding the steel pan and make the holes there. The holes should be big enough to thread two pieces of strong supporting string. You can now apply finishing such as a light coat of paint to the outer part of the steel pan and polish its playing with shoe nugget after smoothing it out with emery paper. You could also send your steel pan to be chrome-plated, which will de-tune the notes. You will therefore have to re-tune them if you decide on this option. Chrome-plating your steel pan will give it a nice finish and provide rust protection, thereby extending its life. Here is a picture of a tenor pan stand. Double Tenors, Double Seconds and Guitar Pans use double stands. Cellos use three. You can purchase your stand online or have it built. 
Steel Pan Mallets (Pan Sticks) Steel pan mallets are made from 12mm diameter wooden dowells that you will cut to a specific length. Place latex rubber tubing at one end of each mallet. For the bass steel pans, sponge balls should be used. This is the end that strikes the notes when you play your steel pan (steel drum). The approximate lengths of steel pan mallets for the various steel pans are given below:
Congratulations! You now know the steps involved in making steel pans. :). The foregoing steps are general; it takes years of practice to perfect the art of making steel pans. There is a great book called "A Handbook for Steel Pan Making and Tuning" by Ulf Kronman which goes into fine detail on making steel pans. You can also check it out. |
